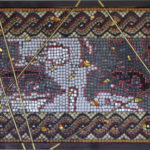
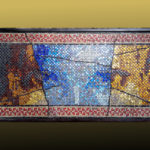
MosaicBlues’ Guerrilla Mosaic
The idea of the guerrilla mosaic came to me during the COVID confinement period, I was living in Alabama at the time. I spent a lot of time studying Roman mosaics, both figurative and geometric, and reproducing their designs and patterns, and I developed a passion for certain geometric patterns I had not previously paid attention to.
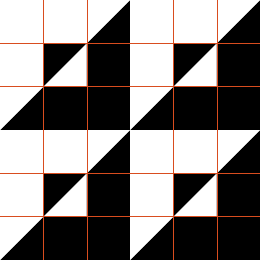
Roman mosaicists generally used these patterns on large surfaces, to construct vast and imposing borders highlighting large figurative mosaics (mythological, warlike, agricultural scenes, etc…)
I told myself that I could use such patterns to build small mosaics intended to decorate small spaces, to bring surprising touches of color or patterns to enlighten otherwise unremarkable surfaces.
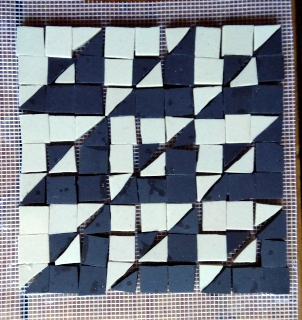
Back in France in 2021, I built a few prototypes, without worrying too much about what I was going to do with them.
In February 2022, horrified by Russia’s invasion of Ukraine, I created some mosaics in the beautiful tones of the Ukrainian flag. a few people installed several of them on rocks, walls, cement tables, in places where people walking or riding by could see them and be reminded of the Ukrainians’ fight for their freedom.
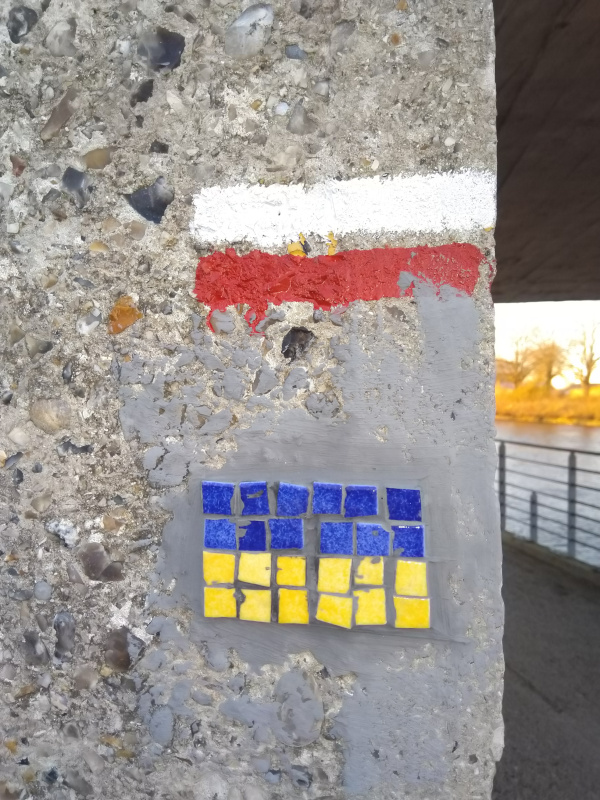
20 month later these small mosaics are still in place and demonstrate the technical validity of the concept.
So I thought about it and came up with the concept of Guerrilla mosaic, a very simple and easy to ship kit allowing people unfamiliar with mosaics to easily install a small mosaic on a support of their choice.
Elements of a guerrilla mosaic
To build a guerrilla mosaic you will need;
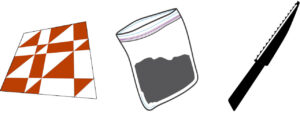
- the kit itself, which includes 3 elements
- three other easy-to-find items
- a support
1. The kit itself
- One mosaic
- one small bag of thinset mortar
- one bamboo spatula / knife
- a small container (bowl, yogurt pot…)
- a bottle of water ( about 1 quart)
- a sponge

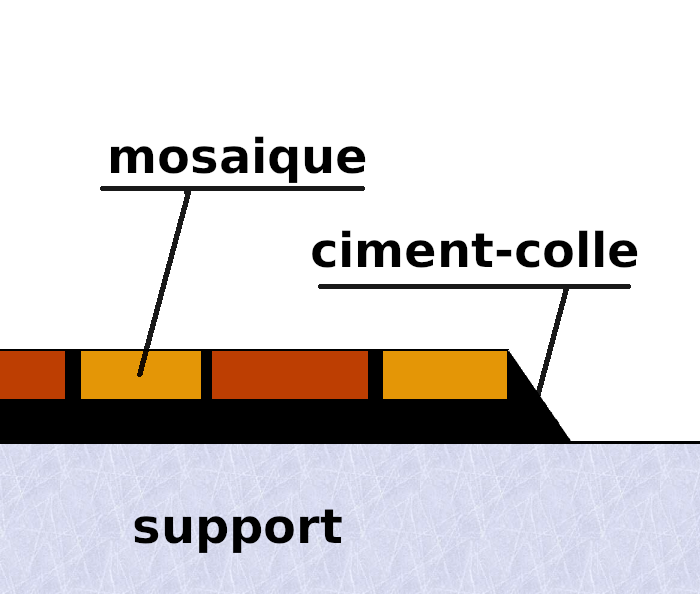
3. The Support
- It can be fixed: a wall, a floor, a rock wall (Make sure you are authorized to install your mosaic there); or removable: a brick, a stepping stone, …
- It must be made of a material to which the cement will stick: Preferably stone, terracotta or cement. Avoid wood, plastic or metal.
A very easy implementation
-
Take your mosaic
-
Mix the mortar and glue until you obtain a smooth and homogeneous paste, NOT a liquid one (It should not fall down if you overturn the bowl).
-
Coat the back of the mosaic with mortar using the bamboo spatula/knife.
-
Apply the mosaic to its support. (See Note 1)
-
Clean the excess thinset mortar glue using the sponge. (See note 2)
And that’s all for now. Installing a guerrilla mosaic shouldn’t take more than fifteen minutes…This video describes the installation of a guerrilla mosaic on a piece of ridge tile.
With love from the Becquerel 🦆
To order a kit :
Email me. I have many models and a wide choice of colors available, but as of today, I have not yet published a catalog. I can also prepare a guerrilla mosaic to your specification, with your design.

NOTES
Note 1 : Applying the thinset mortar : Make sure that the mortar fills all the joints between the tesserae (the small mosaic tiles) and covers the edges of the mosaic well.
Note 2 : Additional cleanup : Once the thinset mortar has set (past 1 hour after the installation), you can clean up the haze left by it on top of the tesserae with the sponge or a dry piece of cloth.l’installatioin, vous pouvez venir nettoyer le voile laisse sur les tesselles avec une eponge et/ ou un chiffon sec.
Note 3 : Outdoor installation : To avoid problems due to frost, # 1 enemy of mosaics, you can treat it with a commercial water repellent product, or with a 50/50 mixture of turpentine and linseed oil, which has advantage of brightening the colors.
- Note 4 : Handling cement based products. Cement is an irritant product and certain precautions must be observed when using it:
- It is recommended to wear gloves.
- Do not let children near it.
- Don’t eat it.
- Do not use it as makeup.
- In case of skin contact with cement, wipe with a clean cloth and rinse as soon as possible.
- In case of significant contact on the skin or any contact with the eyes, rinse quickly with water for 15 minutes.
- If you experience burning or itching (hands, knees, legs, feet), consult a medical doctor.